Accept Payments On Your Site Without a Heavy Shopping System
Have you ever needed to accept payments on your site but don’t have a payment system built-in?
What’s great about Stripe Checkout is that you don’t have to design anything, Stripe has done all the grunt work and all you have to do is create the Product you’re selling in your Stripe account, and then copy and paste the code into your site. Everything on your site happens on the client-side and nothing passes through your server.
Simply put: Stripe has made it easy for you to place a product button on your webpage which opens up a Stripe checkout page with the specific product that they clicked on. From there, users can pay via credit card or even Apple Pay if they’re on a supported device.
What you’ll need
A Stripe account (they’re free).
What you’ll do
1. Create a product in Stripe
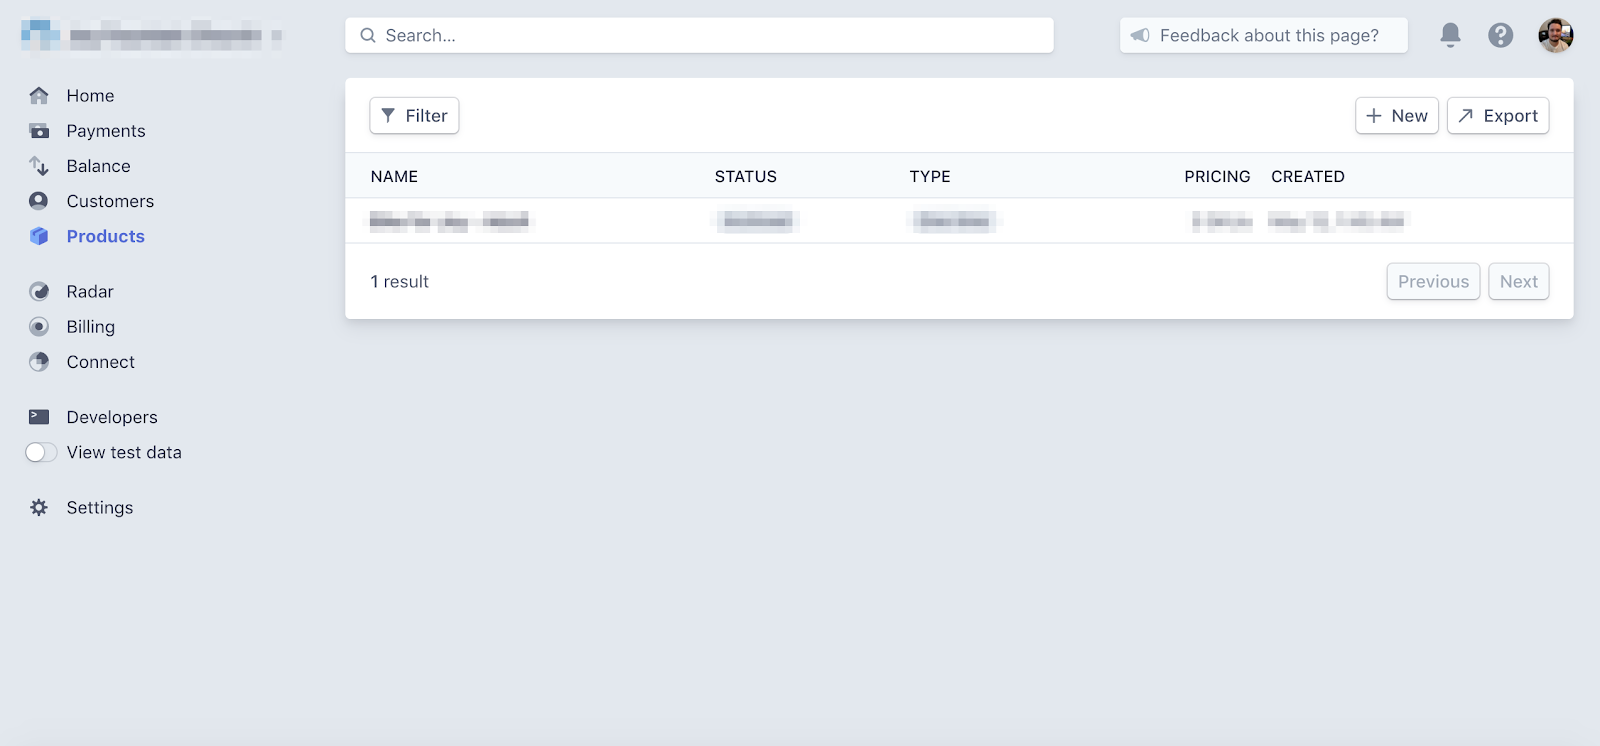
The first thing you’ll want to do is log in to your Stripe account. From there, click on Products from your Stripe dashboard.
Before proceeding any further, I’d recommend setting things up as test products until you’re completely ready to deploy this new feature to your live site.
You can enable test mode by clicking on the View test data toggle in the sidebar.
From there, click on the New button in order to create a new product.
Fill in the information and save your item.
Once it’s added, click on the item and that should open it up for you. If you don’t have any skus yet, add one, otherwise, choose the one you want to use on your site and click the Use with Checkout button.
This will open a display that provides you the code that you’ll copy and paste.
You’ll be given a couple of options at this point to choose where Stripe will send your customers after payment Success or Failure. Type in the URL’s you’d like to use. You’ll want to make sure you have appropriate pages set up for these.
Once you’re happy with everything, copy the code.
2. Add the product code to your site
You’ll now need to paste the code that you just copied on to the page where you want to display your button. Remember, this button opens up your Stripe checkout experience for the user.
If you’re using WordPress and trying to use the editor for this, you’ll have to separate the Javascript portion of your code elsewhere as it will not save any scripts into the editor. You can either add it directly to your theme’s header.php file or there are plugins that allow you to add Javascript code into your site. If you’re not sure how to do either these, you’ll want to reach out to someone that is able to do that for you.
Once you’ve added the code, that’s really all there is to it! The button should now be added to your page and it should open the Stripe checkout when clicked.
You can also make some slight design customizations to your Checkout page from your Stripe account.
Make sure you thoroughly test your setup with Stripe’s test mode on until you deploy this to your production environment. Use dummy card number 4242 4242 4242 4242 to test an actual purchase (Expiry: any future date, CVC: any 3 numbers).
If you run into any issues or just want to dive in deeper, Stripe’s documentation for Checkout can be found here:
https://stripe.com/docs/payments/checkout/client
There’s much more customization you could do with this. I recently built a WordPress plugin for a client that allows them to create events where users can purchase tickets. The client can set up the event in their admin area with various ticket types/pricing for each event, and once published, it displays nicely on their events page.
Ticket purchasers are then easily able to select their tickets and quantities, and once they click Proceed to Checkout, it fires them over to Stripe’s Checkout page with their tickets and quantities ready to go and finish the purchase. Voila.
And last but not definitely not least, it all works great on mobile!
And if all this seems daunting or you’d like to talk to someone about your current IT solutions — we’re here to help. Schedule a strategy call with us at Quantum Fire Labs.